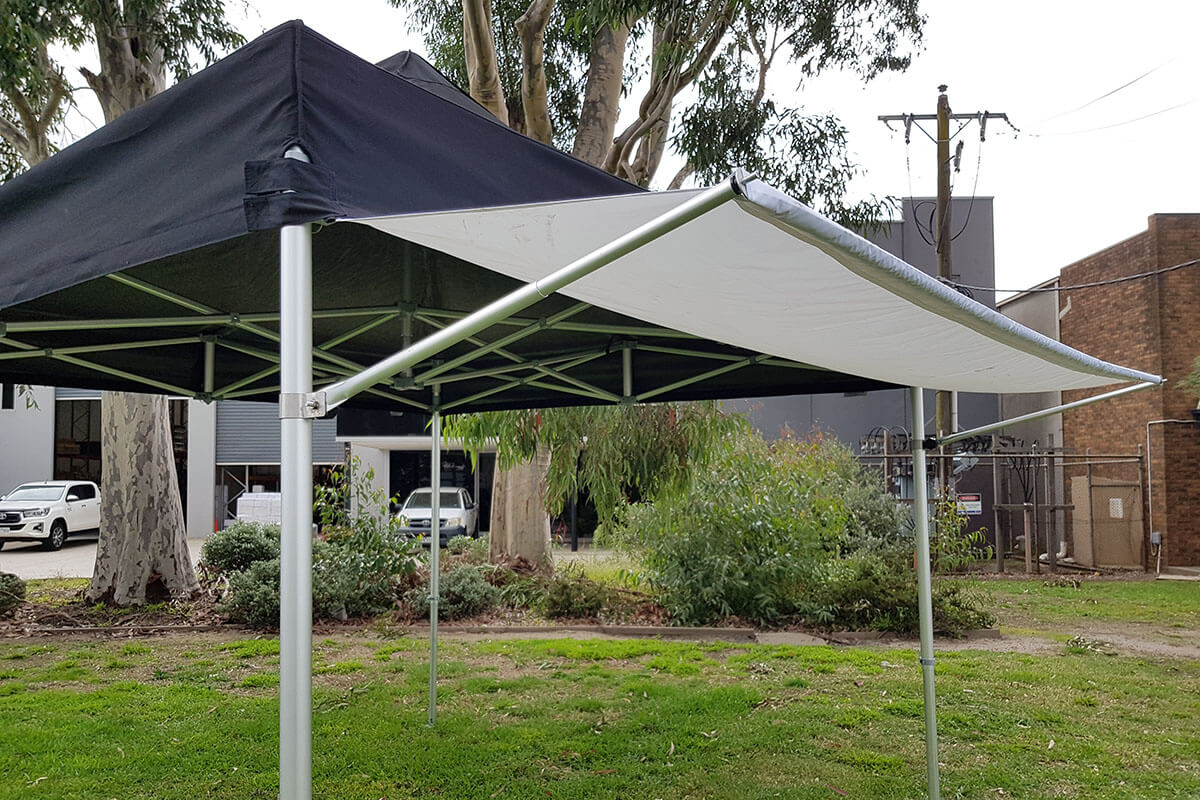
A marquee awning is a great addition to your Technishelter marquee.
The awning allows you to “extend” the amount of shade your marquee provides by around 70cm. While awnings have been commonly sought after for shelter from rain, it is important to know that these accessories are not actually designed to withstand long periods of rain, it’s primary purpose is to provide additional sun protection.
The marquee awning material is affixed to one side of the canopy top with Velcro, and between two marquee legs with it’s adjustable arms. It is a very easy and quick set up process, making it the perfect accessory for market stalls, club promotions, or for anyone seeking a little extra shade.
Installing the Marquee Awning
Frame type: Circulex (Technishelter brand)
Tools Required: No tools as you only need the standard awning components themselves.
The marquee awning comes with:
- Awning material (pocket sleeve on one end with velcro on the other
- 2x adjustable side arms
- 2x clamps
- 1x extendable pole
Total time: 5 minutes
Prepare Clamps and Arms
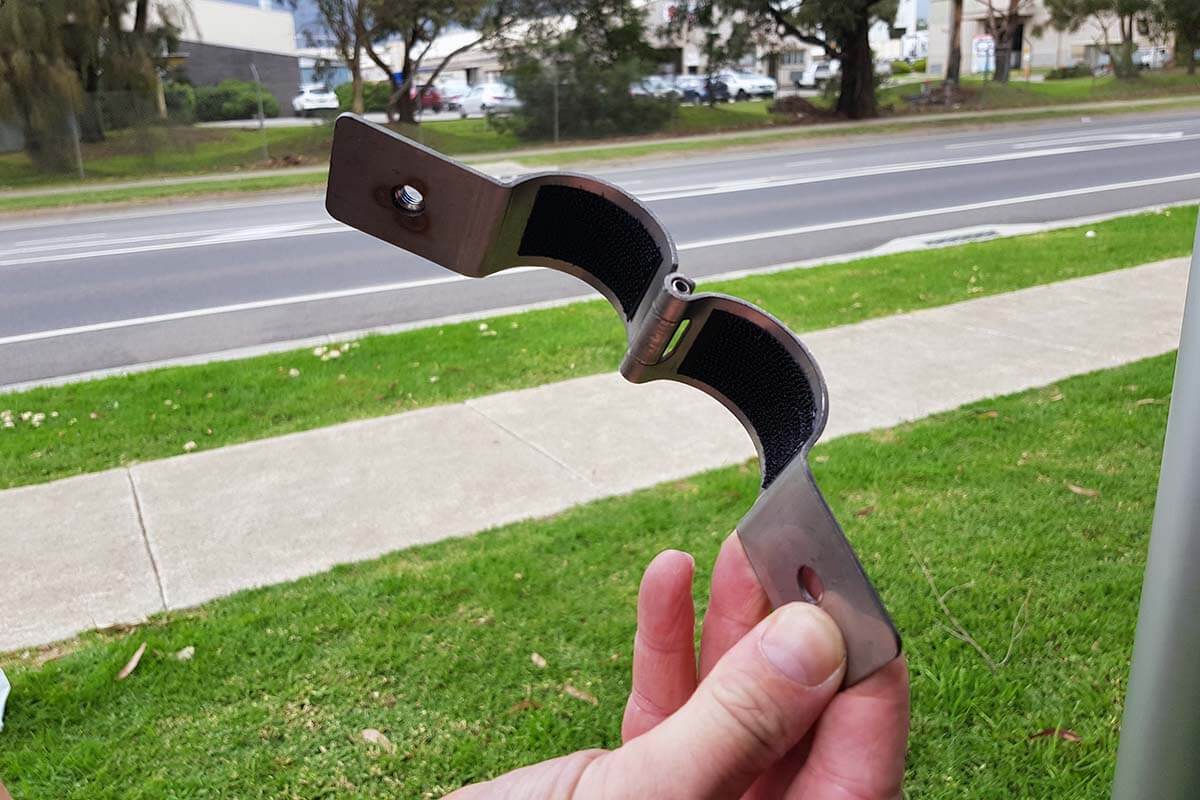
The easiest thing to do first is to set up the clamps and adjustable side arms on the marquee legs.
The side arms need to be opened up and ready to go, so they can be placed into the clamp.
Attach Clamps
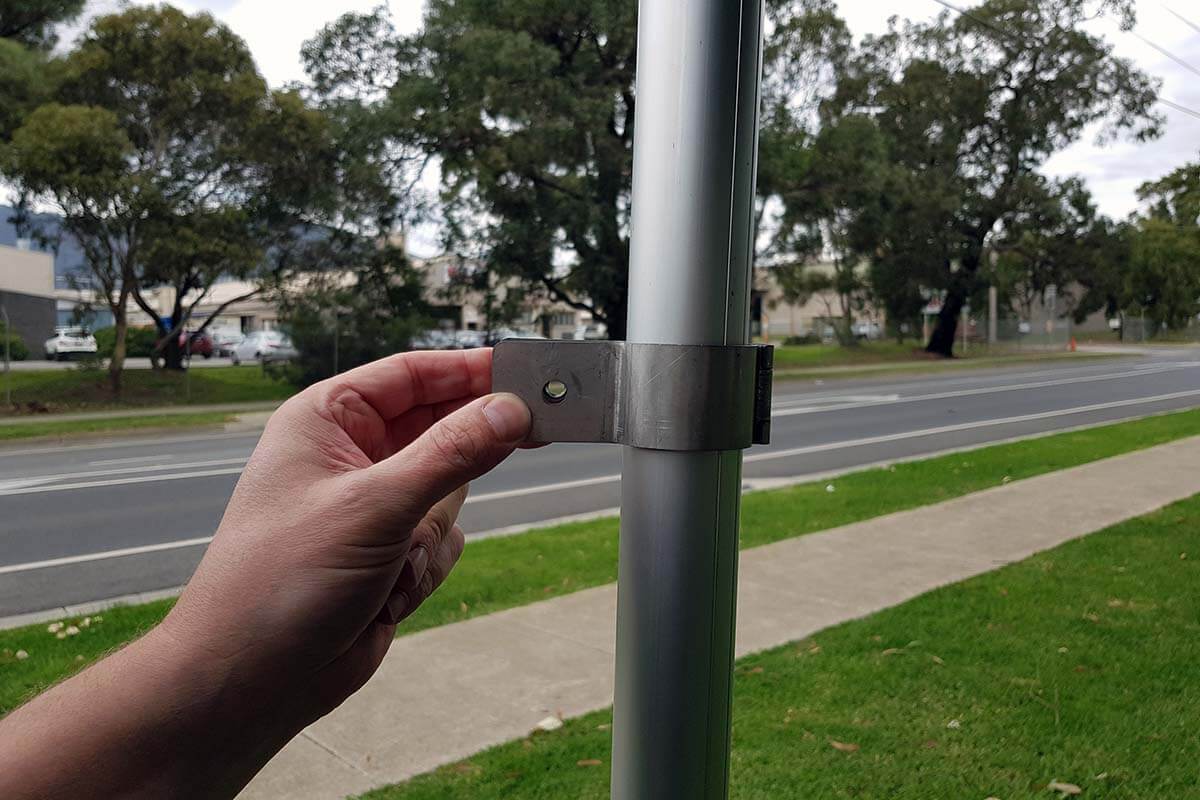
Starting on one leg at a time, wrap the clamp around the marquee leg, approximately 30cm down from the bottom of the valance (roof skirting).
Attach Side Arms
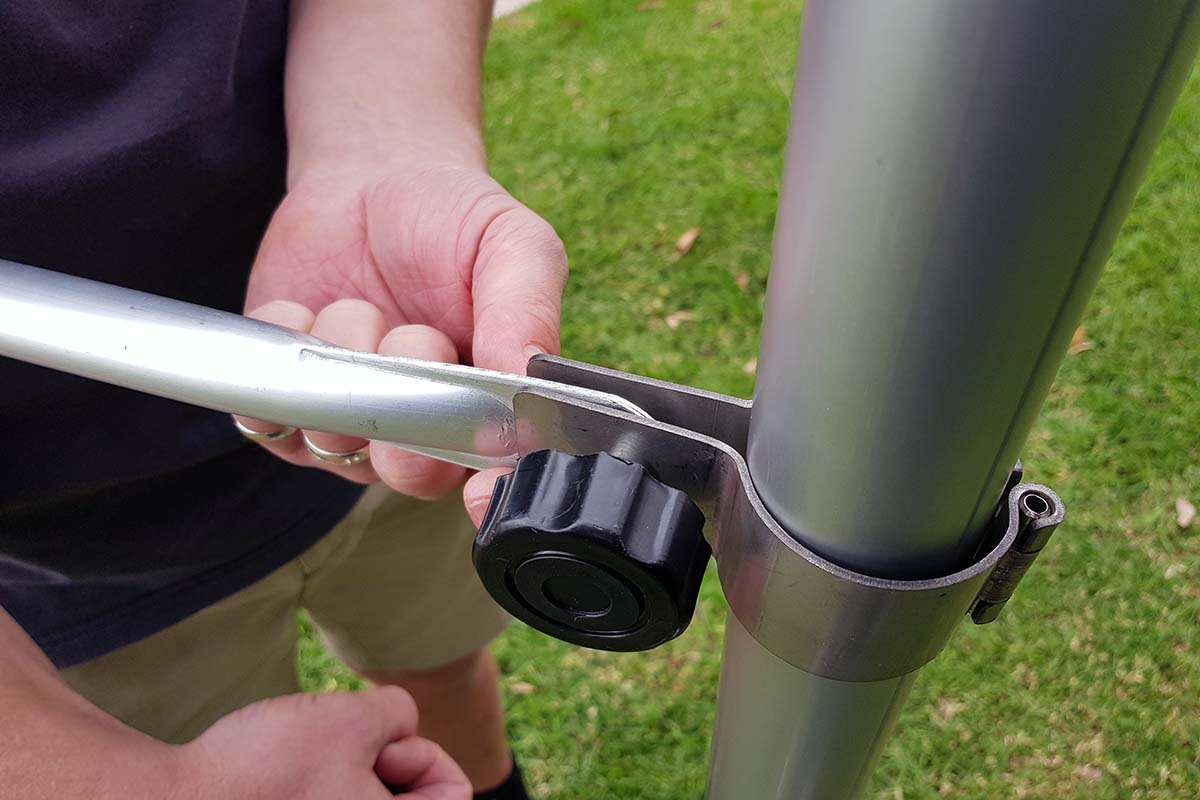
Take one of the side arms and insert it into the clamp, making sure the hole on the side arm lines up with the hole in the clamp.
The black fastener that comes with the clamp needs to be inserted into the hole and tightened. Make sure you don’t over tighten as you only need it to be tight enough to hold the side arm into place.
Repeat the process on the other side.
Position the Side Arms

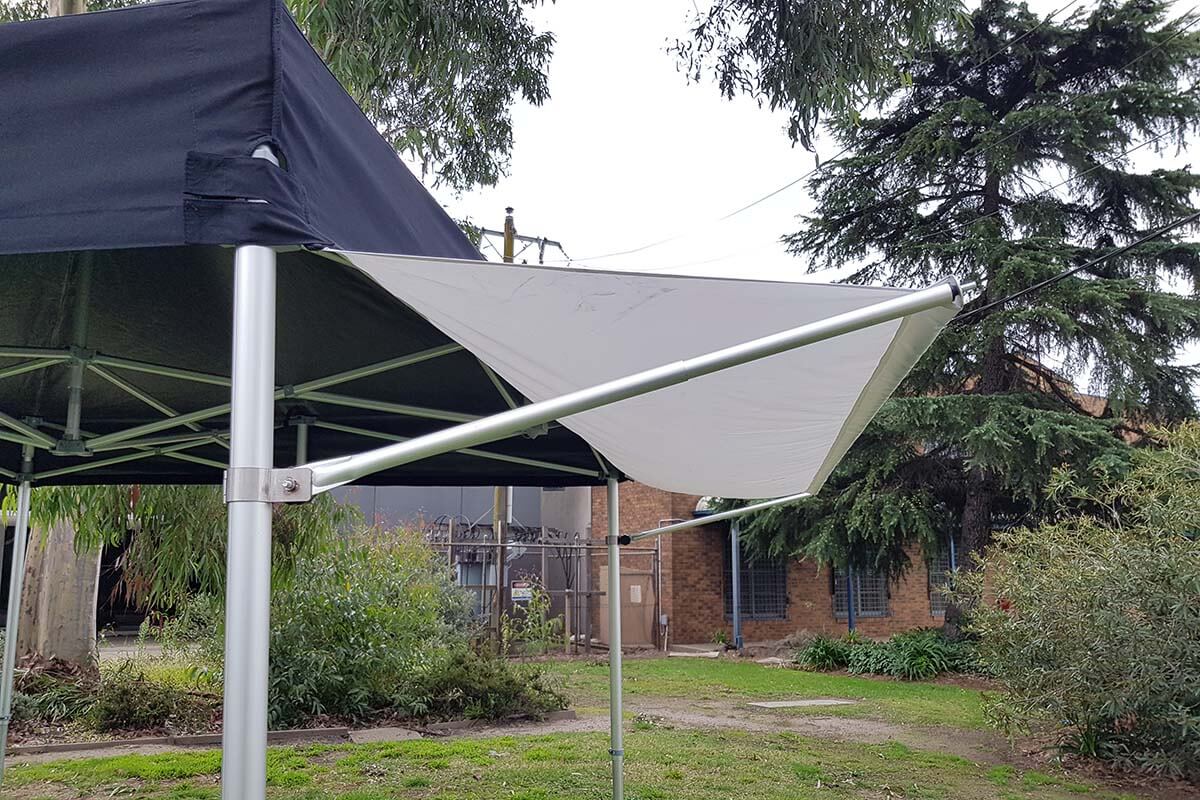
The side arms should be positioned on a 30-40 degree angle as seen in the photo above. If you have the arms sitting horizontally, it will not be strong enough to hold up the weight of the material/supporting pole.
This is very important.
Setting up the Extendable Pole
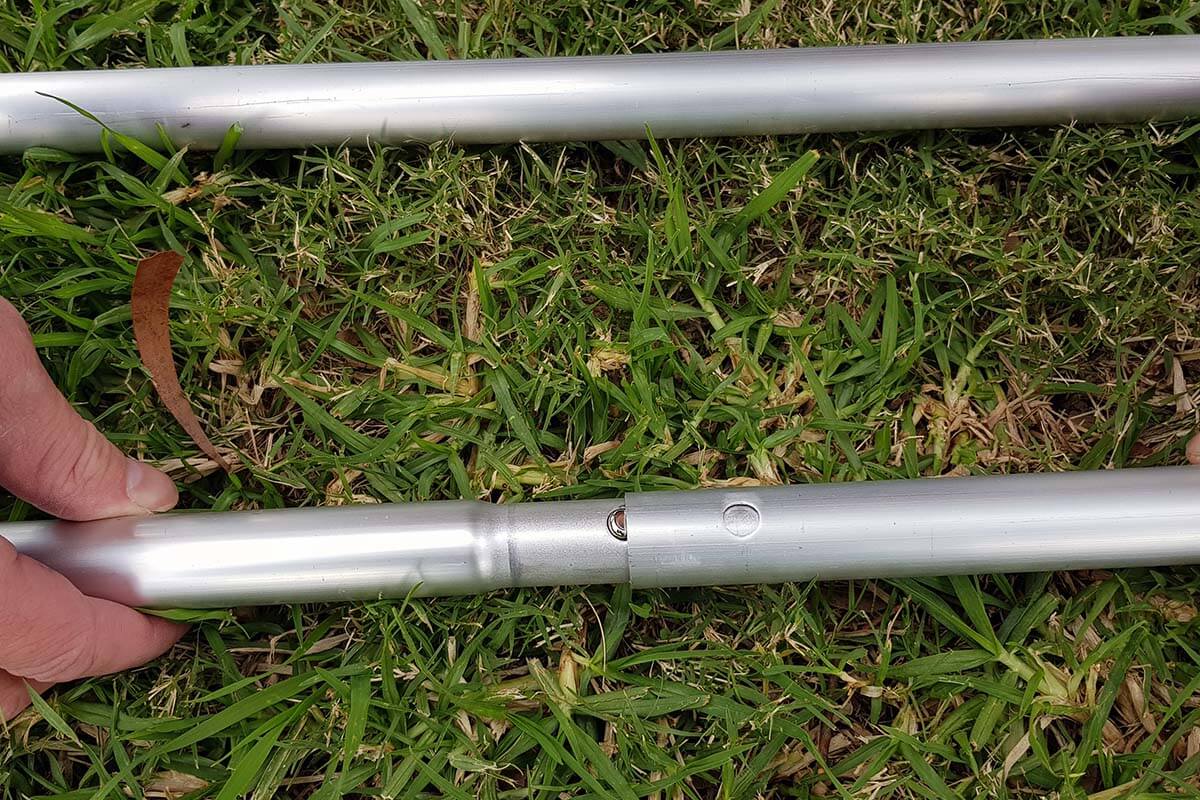
The next step is preparing the extendable pole for supporting the awning material. The pole is comprised of three long pieces.
The longest pole is positioned in the middle, with the two shorter poles going on either end. Slide the shorter poles inside the longer pole, and ensure the push button clicks into the hole of the middle pole.
Putting the Material and Pole Together
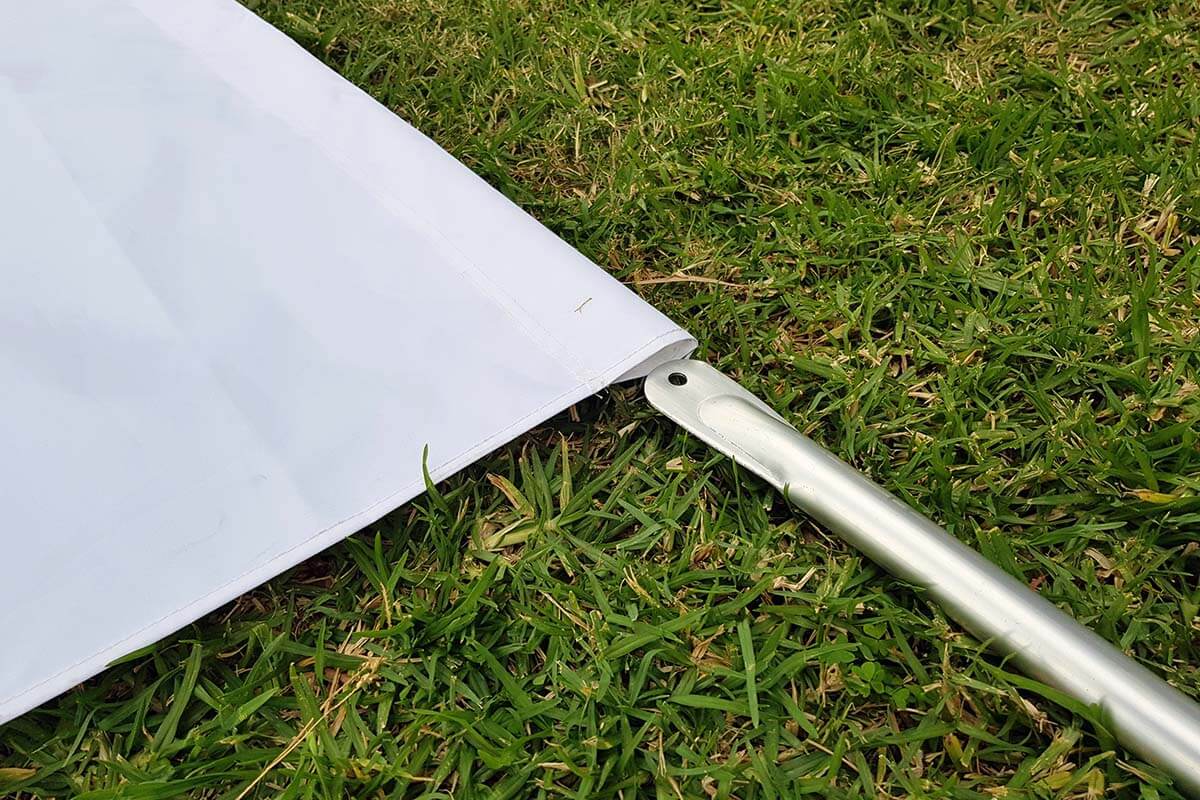
Lay your material out onto a clean surface and push the pole through the sleeve of the marquee awning material until you see it pop out the other side.
Attaching the Material to the Roof
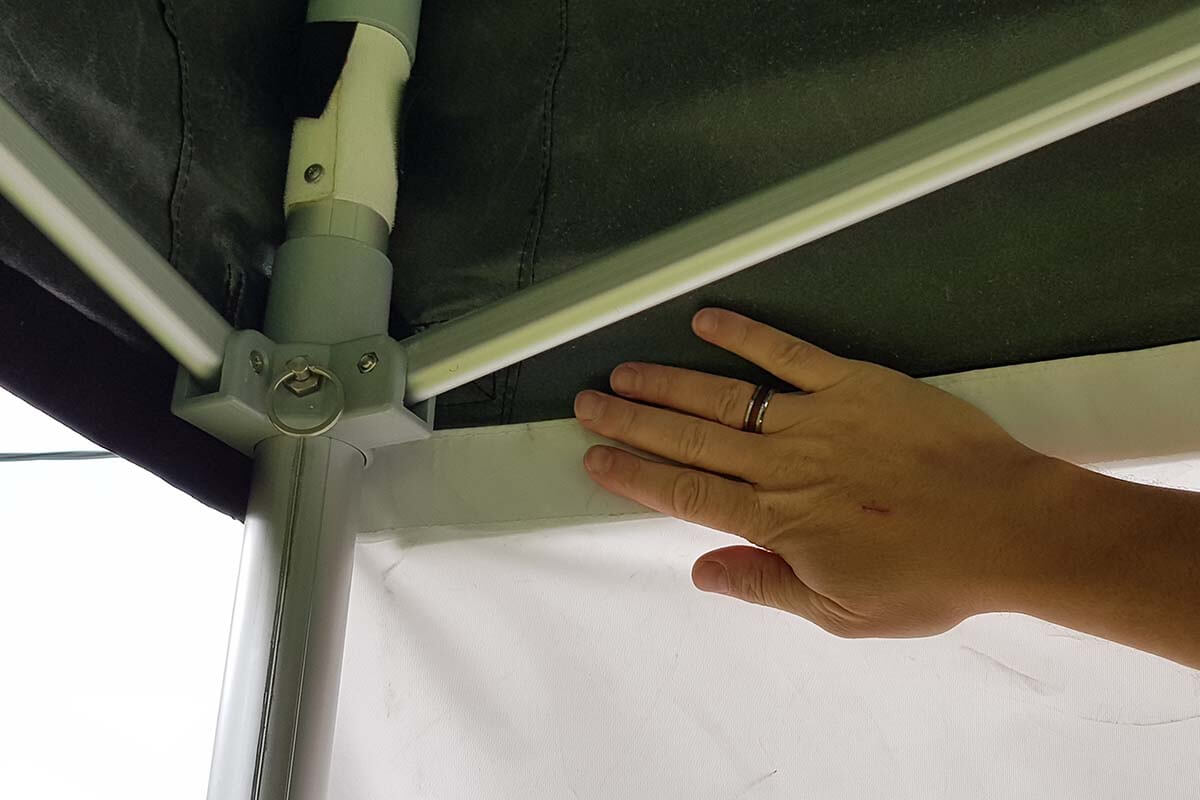
Start at one end of the marquee, and position the awning material on the valance Velcro on the inside of the marquee roof. Run the material evenly along the Velcro until you get to the end. Make sure the marquee awning material is aligned with the top Velcro, with no bubbles in the material.
Attaching the Extendable Pole
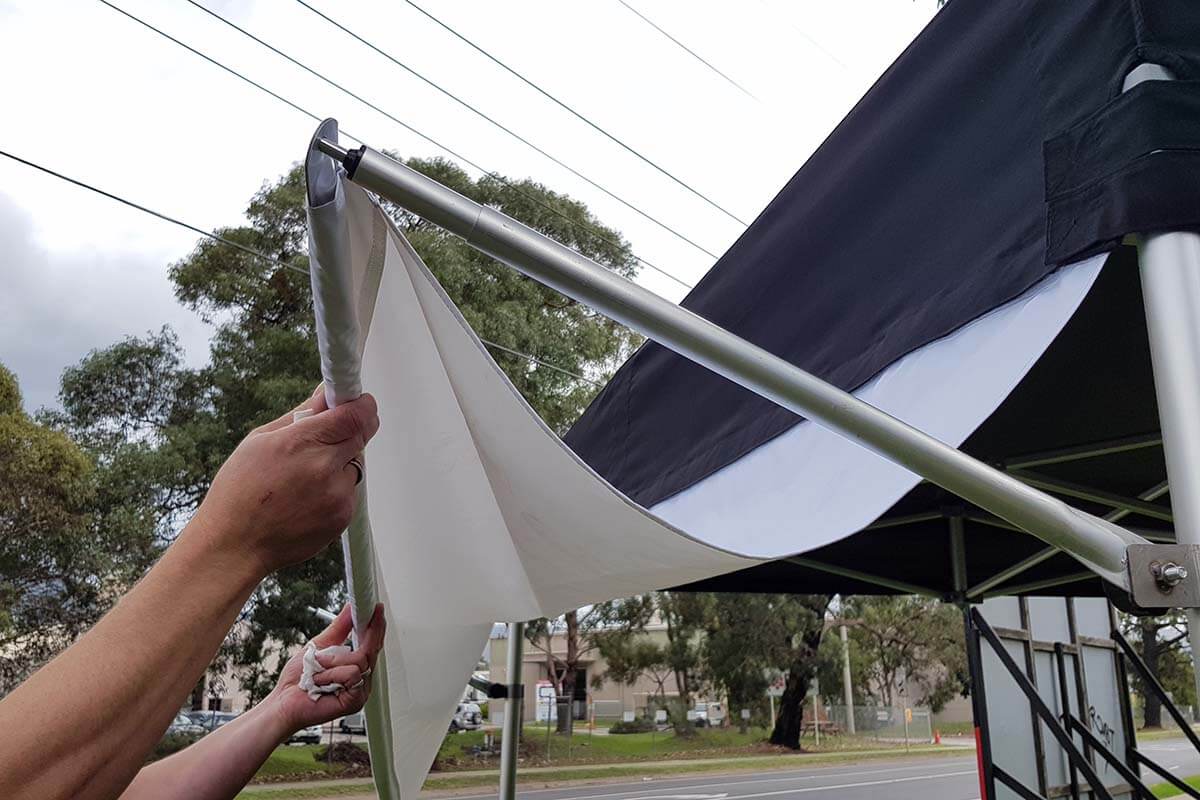
From here you need to insert the side arms into the pole which is supporting the material. The end of the side arm has a small tip and the end of the pole has a hole for it to go into.
The best way to do this is to start at one end of the marquee and extend the side arm up whilst raising up the awning material.
NOTE: If it doesn’t quite reach you may have to re-adjust the lengths of the side arms. All you need to do here is take hold of the inner half and outer half of the side arm, twist, and push inwards or pull outwards to adjust the length.
Adjust the Awning Position
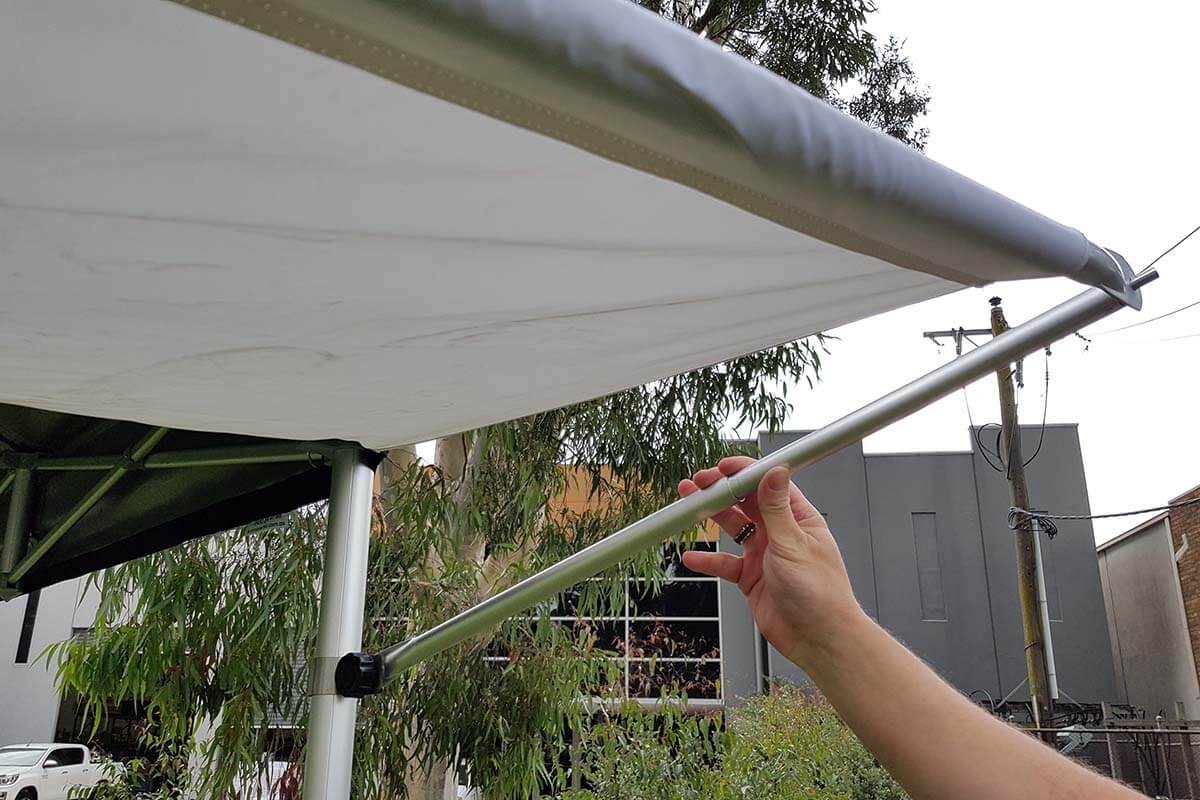
At this point you need to make sure the pole and the marquee awning material is sitting horizontally. To do this, simply re-adjust the side arms. Again, take hold of the inner and outer pole, twist, and push inwards or pull outwards to adjust.
When you have finished setting up the awning, the material should be horizontal, the side arms should be 30cm down the marquee leg from the bottom of the valance, the side arms should also be positioned on a 30-40 degree angle.
Conclusion
Your marquee awning is now set up and ready to face some action!
We hope you have found this step by step guide helpful and that you now feel confident in setting up like a professional. Should you have any further questions about our awnings or marquees, our friendly team are more than happy to help!