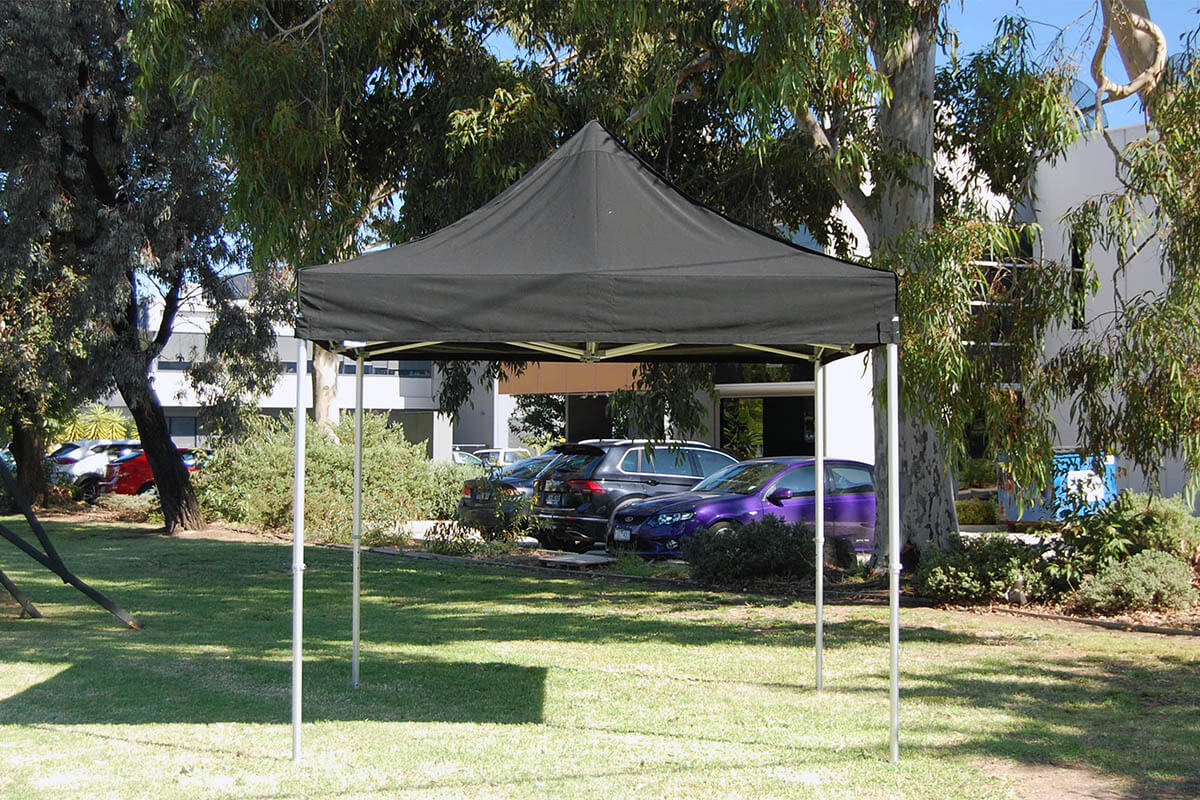
We all know that person who likes to assemble themselves, and disregard the user manual. While we can appreciate their determination and problem solving abilities, often it is best, and safest, to follow instructions from the people. Ensuring the proper installation of your marquee roof is one of those things you need to do right.
Why Fitting Your Roof Properly is Important
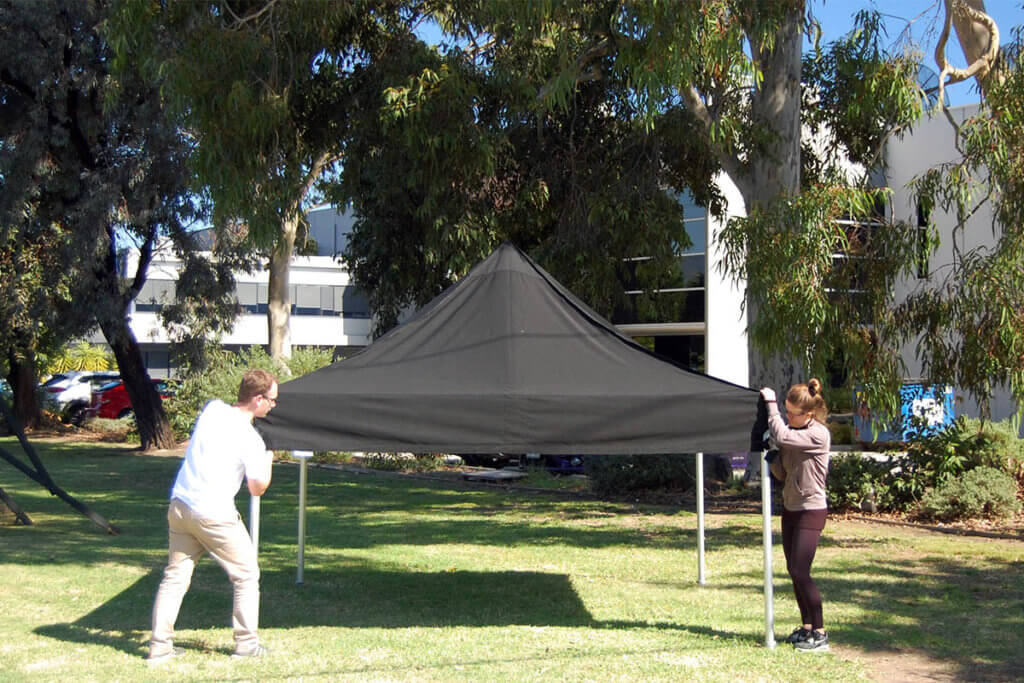
Making sure your marquee roof is fitted to the frame correctly before use is imperative. It may seem insignificant, but a small mistake can have a big impact. Here are some common examples of issues caused due to an improperly fitted roof:
What if the corners are not aligned?
Unaligned corners can put undue stress on other areas of the fabric, creating weak points. This could lead to tearing, pulled stitching, holes formed through friction, and overall speed up the deterioration of your roof.
Why should the centre pouch be used?
Keeping the centre of your roof secured is pivotal in ensuring that your roof does not slide out of position. In heavy wind and rain, you could experience water pooling, which the increasing weight of the water can further stretch the fabric and damage your marquee frame.
What happens if the velcro tabs are left unattached?
Don't underestimate the strength of Velcro. The corner Velcro tabs help keep the marquee roof in place. A strong gust of wind could reposition your roof and you could face similar consequences as above.
The valance tabs as well also help play a role in securing your roof and keeping it taut. It helps share the load of the corners, which will benefit the overall lifespan of your marquee roof.
Step By Step Guide
The roof must be fitted correctly to the frame to allow water run off and to maintain strength in wind.
Total time: 5 minutes
Partially Open The Frame
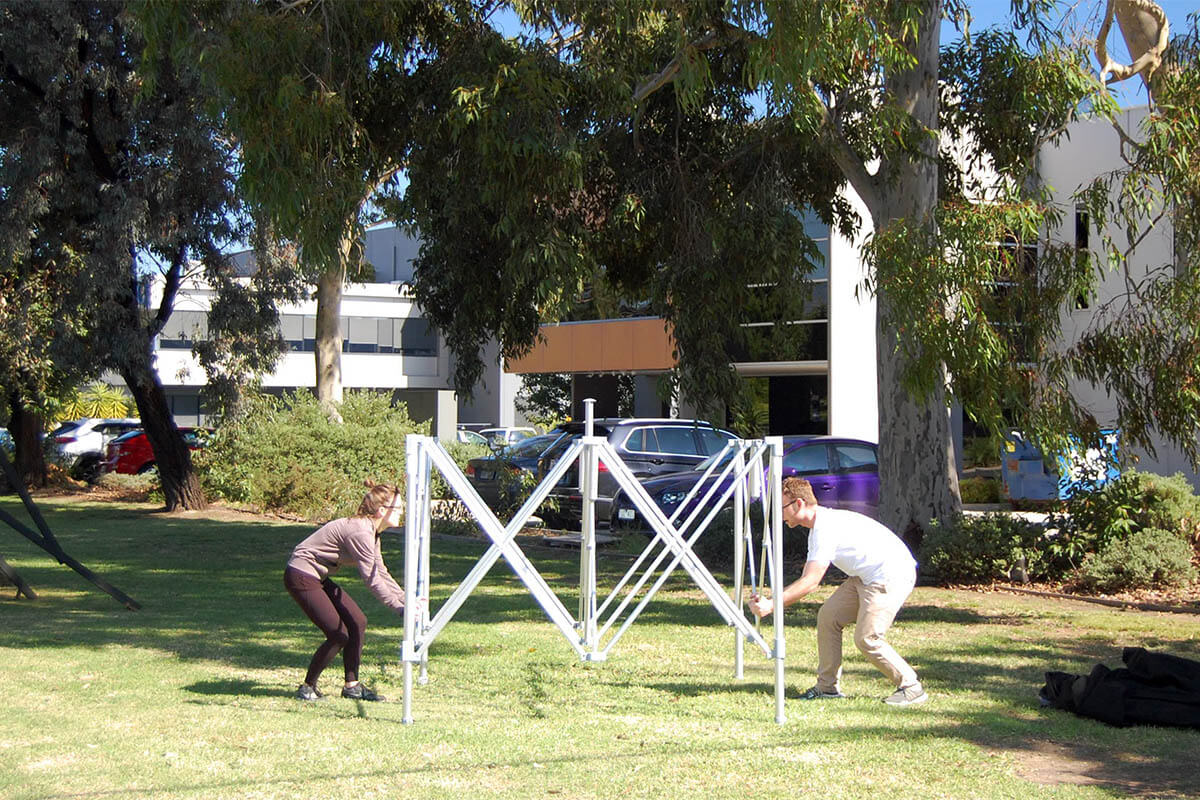
Open your frame around 30% of the way, so that the centre pole is around face height. You will need to be able to reach this pole in the next few steps. Note: Rectangular gazebos can have 2 or 3 centre poles.
Position The Roof To The Frame
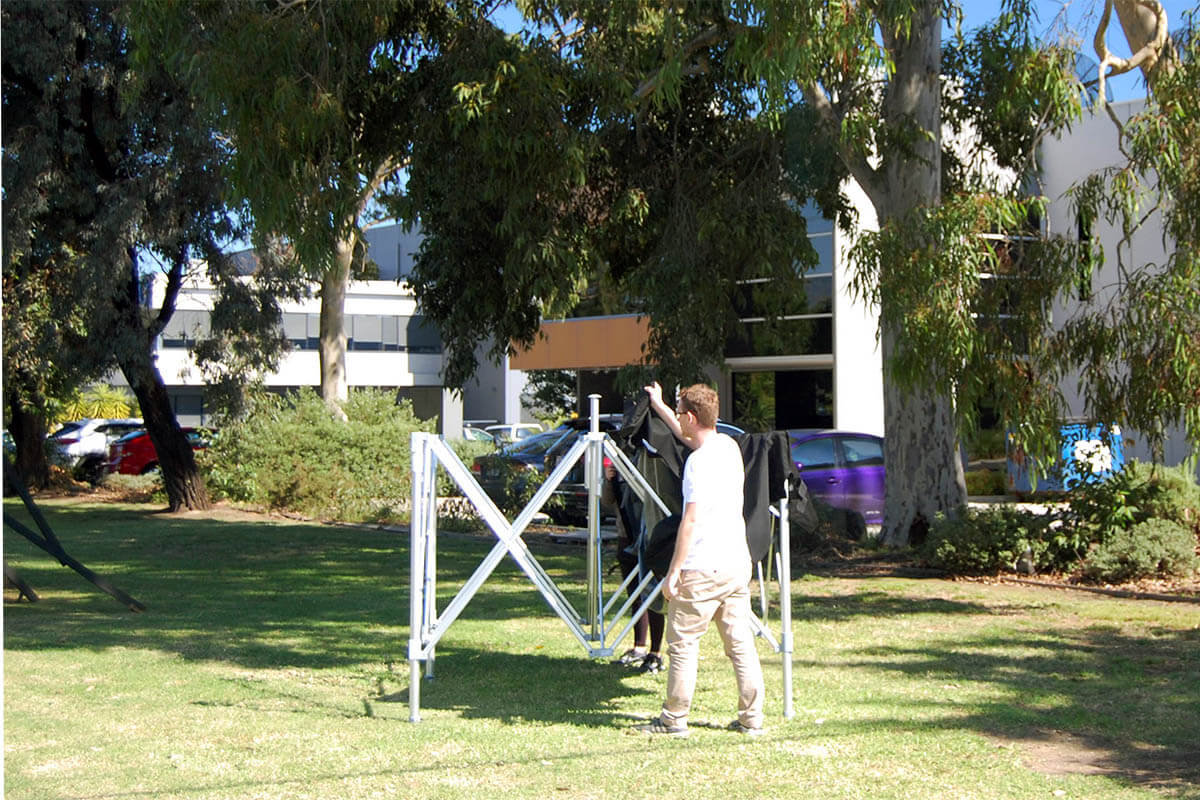
Just like when you find the corners of a fitted bed sheet, we recommend opening your roof, and taking hold of two parallel corners. Throw one corner over the frame and line it up to the corner leg opposite you, and then line up the other corner to the corner leg closest to you. Repeat this on the other side.
Secure The Corner Velcro
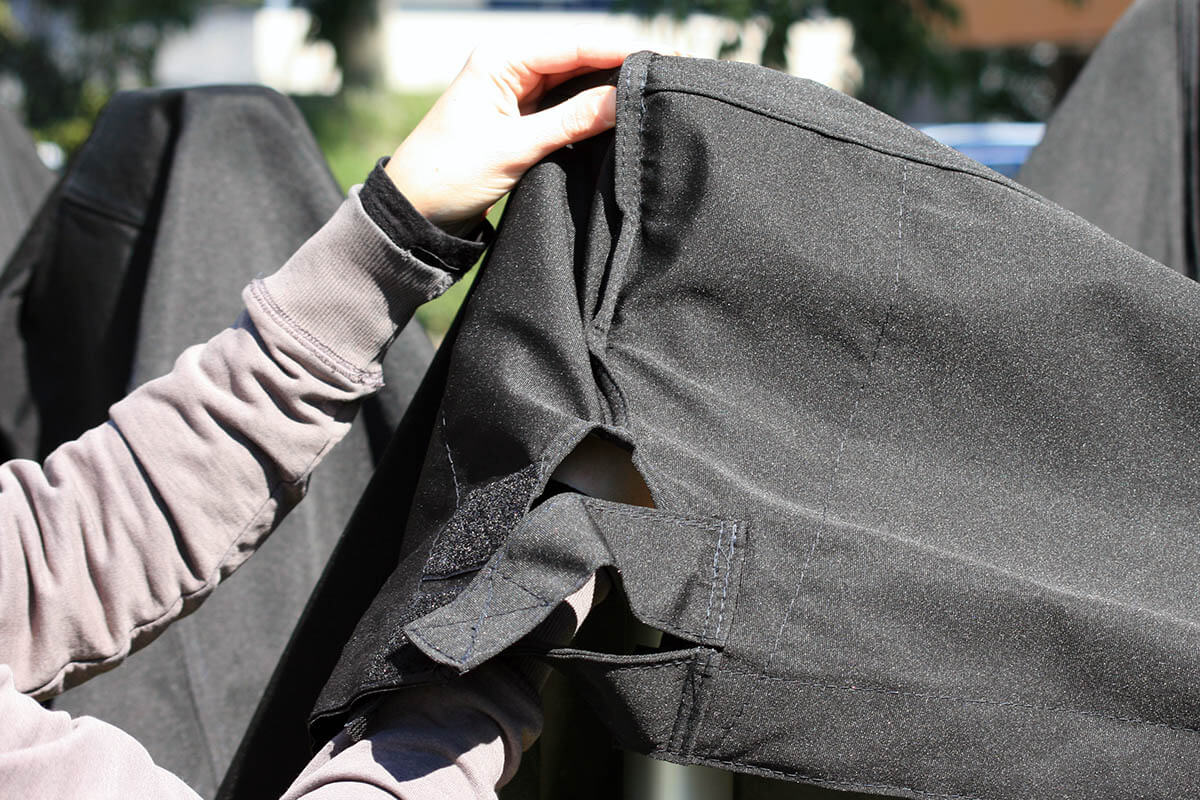
The corners of the marquee roof need to be attached to the frame correctly. Ensure the canopy top is sitting square with the gazebo’s corner connector. Use the Velcro inside each corner of the canopy roof and attach to the leg of the gazebo frame. The corner should be tight and properly secured.
Attach the Centre Pole Pouches
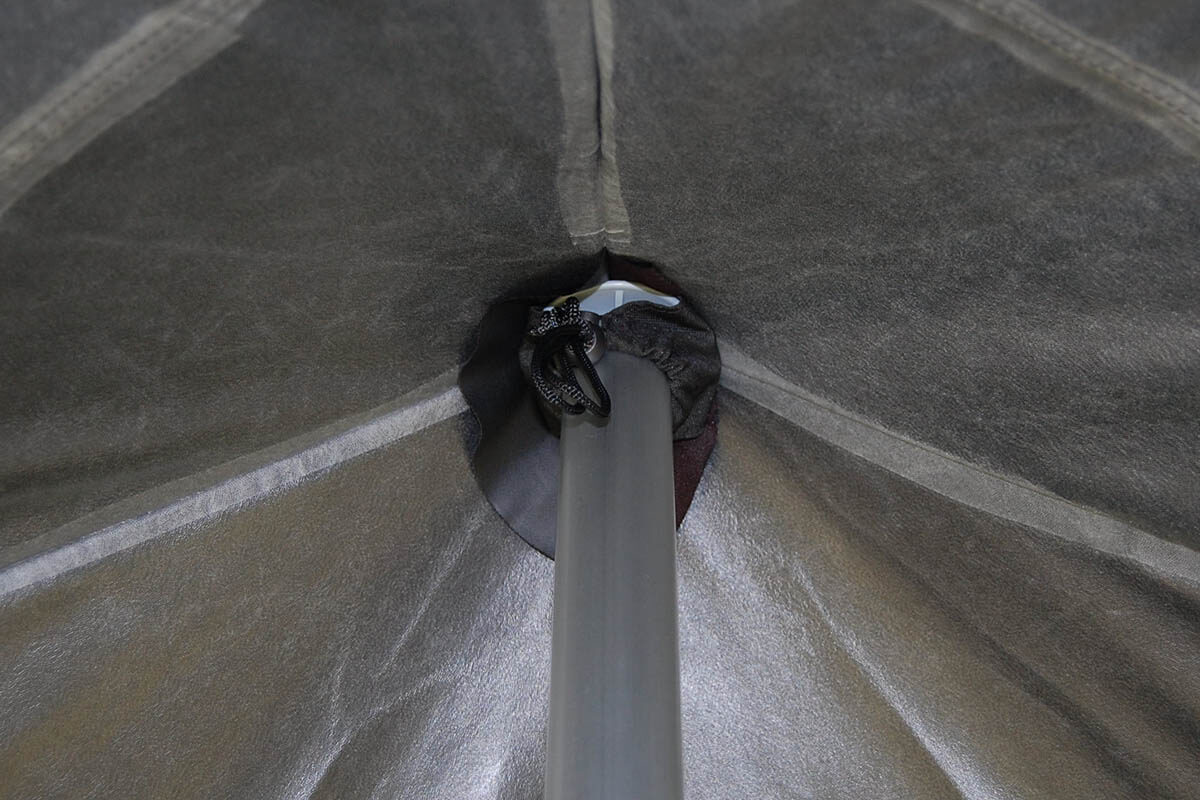
Place the pouch over the top of the centre pole, and pull the drawstring tight. As these can slip out over time, it is recommended that you tie a knot for any excess length.
Secure The Valances
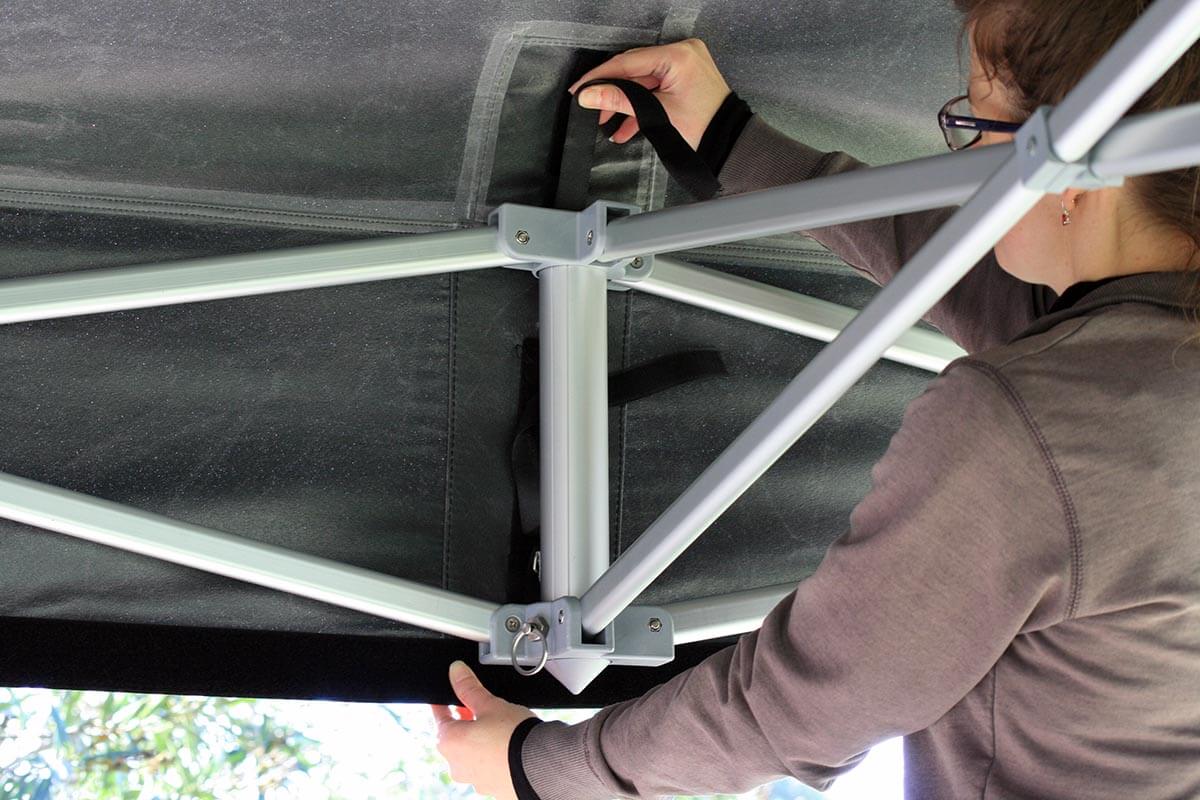
Halfway between the legs, there are two sets of lengthy Velcro straps that align with the connectors. They may seem small, but they both serve an important role in preventing roof pooling.
Feed the upper Velcro strap by pushing it up from underneath the upper connector, through the slits, and smooth it back onto itself. Once the top Velcro is attached, repeat the same for the bottom Velcro.
Finishing Up
You are now ready to finish setting up your marquee and can be confident that the canopy roof is ready for action.
Regular maintenance is still important to keep your marquee functioning at full capacity, so check to make sure that the Velcro straps and centre pole pouches are still in place. If you notice any wear and tear, we recommend organising repairs or material patches as required. We generally have small patches available for repairs and are happy to supply them at no additional cost.
Should you have any questions or concerns about your marquee roof, please reach out to us as we’ll help you get back on track.
